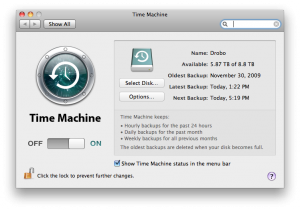
Although Apple should be commended for including a standard backup application as simple and easy to use as Time Machine, it’s not very configurable. Simplicity cuts both ways: By making it a simple “on” or “off” proposition, Apple makes it much easier for home users to back up their data. But it also means it’s not obvious how to modify the settings. For example, Time Machine always uses a one-hour backup schedule, and this doesn’t fit every user’s needs. Although it’s not simple, it’s a straightforward matter to adjust the frequency of Time Machine backups.
I previously wrote about Tuning Time Machine to select which files and folders to skip when backing up, as well as How To Move OS X Time Machine Backups To A New Disk.

I love Time Machine, but it really slows down my laptop while running. Plus, my Drobo automatically spins its drives down after 15 minutes of inactivity and I didn’t want to have it spinning them up all the time. So I set about figuring out how to change the 1-hour Time Machine backup interval.
Although the main Time Machine preferences pane is sparse in the extreme, the backup applications is somewhat tunable. Settings are stored in a file, “/System/Library/LaunchDaemons/com.apple.backupd-auto.plist” and can be modified there. The setting for backup frequency is called “StartInterval” and the default is “3600”, or 3,600 seconds – that’s one hour for us plain folks!
Caution! It’s easy to cause serious trouble modifying plist files!
First, consider what your desired setting will be. I decided on 14400 seconds, or 4 hours, as a compromise between data protection and peace. I imagine some might want to try more frequent backup – maybe every half hour (1800 seconds), but don’t go too frequent. You don’t want a backup still running when the next one kicks off!
Now comes the fun part. If you’re new to the UNIX command line and the VI editor, you should read through a few times to make sure you know what to type and when!
- Open a command-line Terminal session by typing “Terminal” in Spotlight or double-clicking the “Terminal” icon in the Utilities folder under Applications.
- Make a backup of your configuration file by typing the following:
- Copy the following line to the command prompt, or carefully type it in:
- Type your password at the prompt to authenticate.
- You’re now in a text editor called VI. Although old UNIX-heads like me love it, it’s easy to make a mistake here. If in doubt, type the following key sequence (one after the other, not all together) to exit without saving your changes:
- Locate the correct key by typing the following and pressing enter:
- We’ll change that now. I’m using my choice of 14400 but you can use any number of seconds. Type the following without pressing enter:
- You should now see your new value between the brackets like so:
<key>StartInterval</key>
<integer>14400</integer>
<key>RunAtLoad</key>
- If you’re happy, type the following to save and exit:
- If something terribly wrong happens, you can revert to the original (saved) backup by typing the following:
- You may now exit the Terminal session.
cp /System/Library/LaunchDaemons/com.apple.backupd-auto.plist ~/Documents
sudo vi /System/Library/LaunchDaemons/com.apple.backupd-auto.plist
escape : q ! enter
/3600
cw14400 escape
escape : w q enter
sudo cp ~/Documents/com.apple.backupd-auto.plist /System/Library/LaunchDaemons/
There is no need to reboot or restart. Open the Time Machine preferences page and it should list your “Next Backup” as being four hours (or whenever) from the “Latest Backup”. Sweet!
Stephen may I suggest a much simpler approach? Download TimeMachineEditor.
http://timesoftware.free.fr/timemachineeditor/
Worked great for me – don’t know why you want a special editor to do it.
TimeMachineEditor makes sense *if I turn Time Machine off in the System Prefs*. I don’t like this idea.
I prefer the file editing solution.